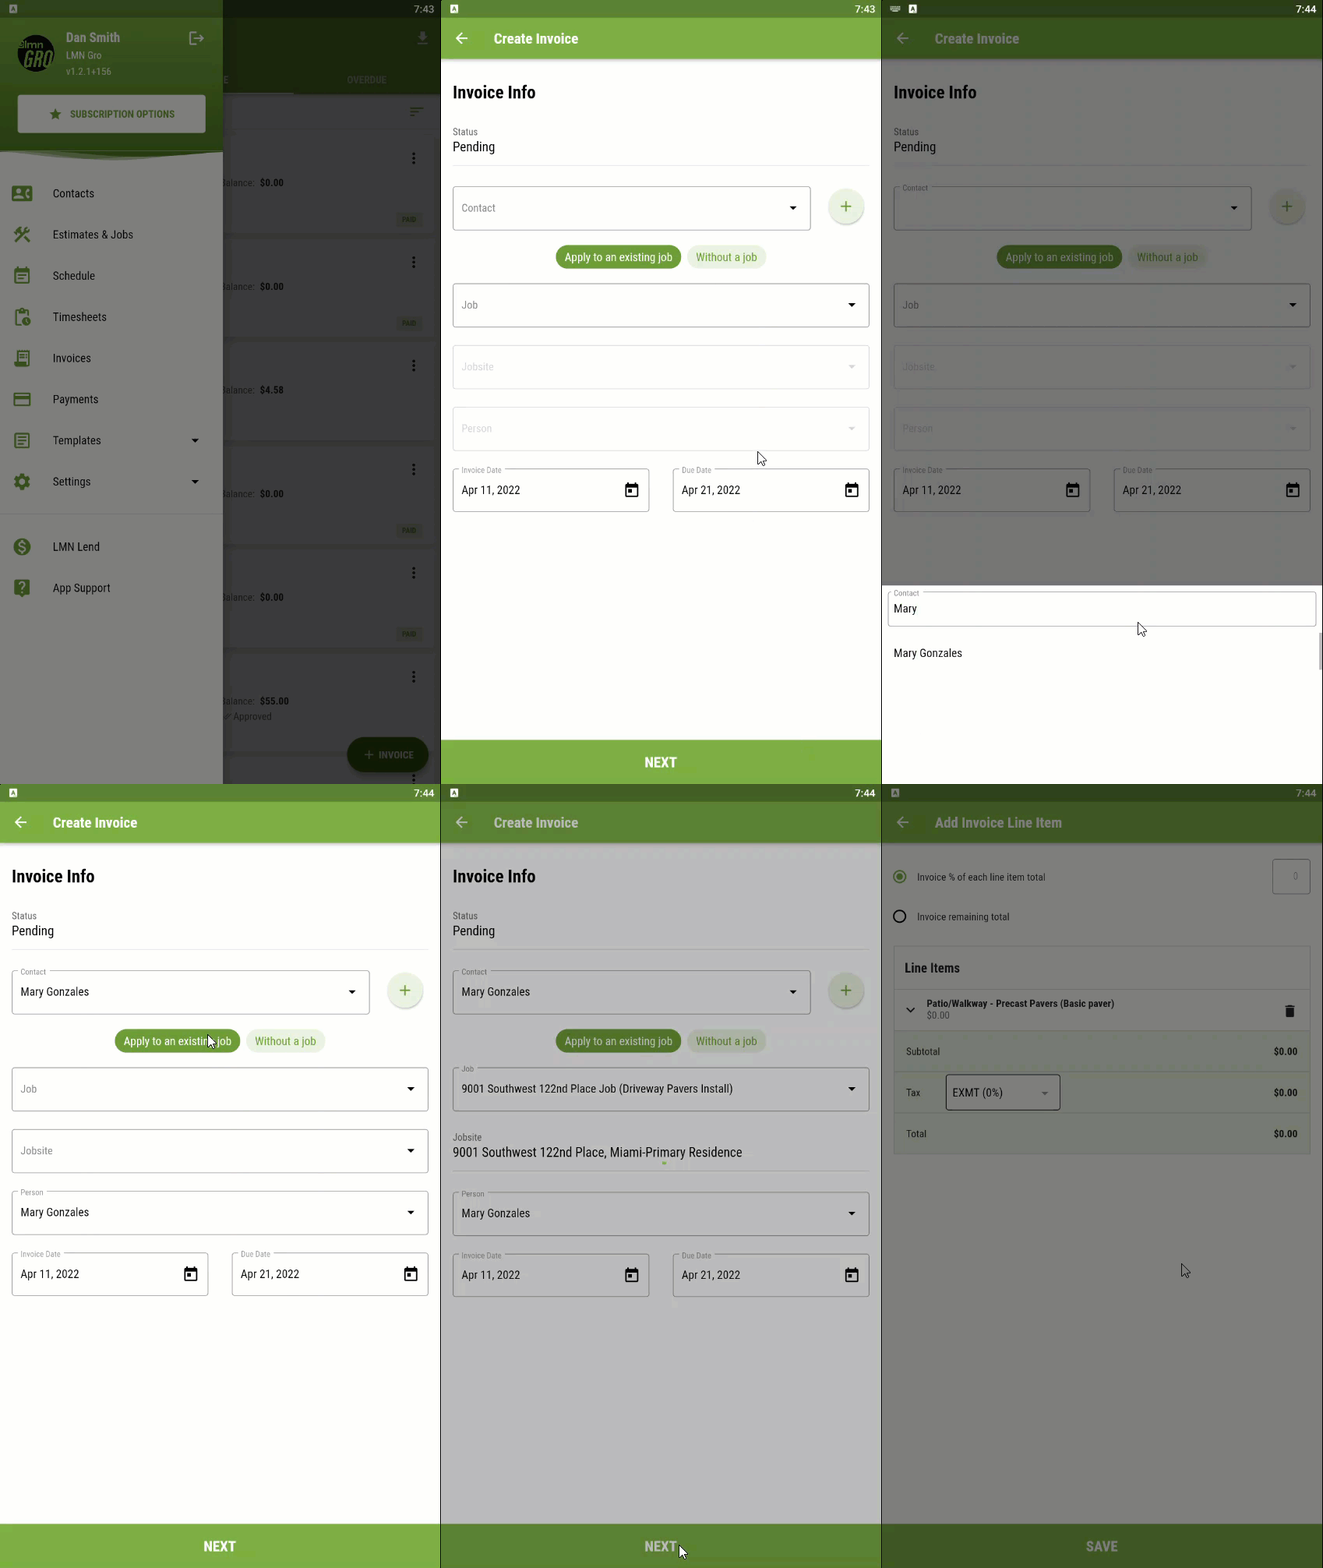
How to create an Invoice for an existing job
- Select Invoices from the navigation pane.
- Tap the +Invoice button.
- Select a contact from the dropdown box or tap the “+” button to create a new contact for the invoice.
- Tap the Apply to an existing job button
- Select your Job from the dropdown box
- Once you tap on the Job, the jobsite, the person and invoice date, and due date information gets automatically populated
- You will be asked if you would like to:
-
- Build an Invoice from scratch
- Invoice per visit job tasks or
- Invoice a % of Fixed Price job tasks: This option allows you to charge a portion of the total price for instance, in cases where you may require a downpayment or you may be doing progress billing.
-
- Tap Next to confirm the information above

- To populate the Line Items on the invoice tap the +Line Item button.
- Enter the Item Info i.e. the service you are billing, the date, description, quantity, and unit price
- Click Done to confirm.
- Once you have added all of the line items to the invoice, tap on the 3 dots on the top right-hand side of the screen. Click Approve.

- To view the invoice, return to the invoice screen by tapping the back arrow at the top of the screen.
- Once your invoice has been marked approved, tap the three-dot menu at the right-hand side of the invoice to:
-
- Send to customers by Email
- Download as a PDF
- Mark as a Bad Debt
- Delete
-


Comments